Skip to content
Here is the core truth most homeowners do not hear until after a project goes wrong: paint quality matters far less than preparation quality and process. A premium coating applied over a surface that wasn’t properly cleaned, primed, or sequenced correctly will fail early—peeling, cracking, or blistering within a season or two, no matter how good the paint was. Many of the most common house painting mistakes originate with the initial planning and preparation stages.
That matters even more on the South Shore. Coastal towns like Scituate, Cohasset, Hingham, and Duxbury deal with salt air that accelerates corrosion and adhesion failure. Older homes in Quincy, Braintree, and Weymouth often carry multiple layers of old paint. The freeze-thaw cycle that runs from November through March pushes moisture into any surface crack and widens it. Algae and mildew thrive in the humidity that rolls in off the water.
Below are some house painting mistakes we see homeowners make on projects across the South Shore—and some handy house painting tips to help you know what to do instead.

MISTAKE #1: SKIPPING OR RUSHING SURFACE PREP
Preparing a house for painting isn’t optional. Skipping or rushing preparation is the single most common reason paint fails ahead of schedule. Preparation is not a preliminary step — it is the foundation the entire finish depends on. This is one of the key house painting mistakes that can sabotage the entire project if it is overlooked.
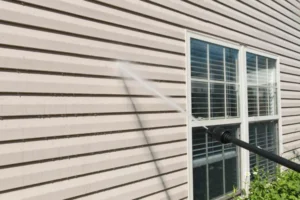
- Homeowners often skip power washing or use the wrong pressure. Salt deposits, algae, mildew, and oxidized paint build up on South Shore homes year-round and are rarely visible from the street — but all of them destroy adhesion. Soft wood siding and cedar shingles need lower pressure to avoid raising the grain or forcing water behind the siding; masonry and brick can handle more.
- Surfaces get painted before they’re fully dry. After washing, surfaces typically need 48–72 hours to dry completely, depending on temperature and humidity. Painting over a still-damp surface traps moisture under the film.
- Bare wood gets skipped over instead of spot-primed. Once you scrape loose or flaking paint and sand the edges smooth, spot-prime bare spots before applying the full coat. Skipping this creates uneven absorption and weak points where the topcoat can lift.
| Surface | Recommended Wash Pressure |
| Wood siding, cedar shingles, older clapboard | ~1,200–1,500 PSI (lower, to protect the grain) |
| Masonry, concrete, brick | Higher pressure, adjusted to surface condition |
How to avoid it: Treat prep as its own phase of the project, not a step to rush through on the way to painting. A professional crew adjusts pressure and dry time to the specific surface rather than using one setting for the whole house.
MISTAKE #2: PAINTING IN THE WRONG ORDER
The order surfaces get painted in affects both finish quality and how much rework is needed later.
- Trim gets painted before siding. This common mistake leads to lap marks and overpainting. Exterior work should move top to bottom — soffits and fascia, then siding, then trim, then doors and shutters last.
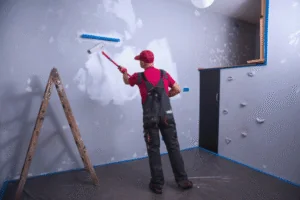
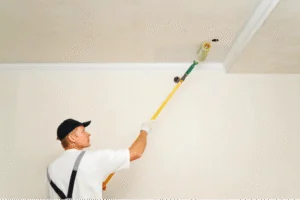
- Walls get painted before the ceiling. Inside, the ceiling should always go first so roller spatter and edge drips fall onto walls that haven’t been painted yet.
- Cutting in gets rushed. This is the 80/20 rule in painting: roughly 80 percent of the visible quality in a finished job comes from 20 percent of the work — the edges, the corners, the transitions between surfaces and colors. Rolling a wall is the easy part. Clean lines at every transition are what separate a professional result from an amateur one.
How to avoid it: Follow a consistent top-to-bottom, ceiling-to-trim sequence, and budget real time for cutting in rather than treating it as a quick pass at the end.
MISTAKE #3: USING THE WRONG PAINT FOR A COASTAL CLIMATE
This is one of the common house painting mistakes we often see in the South Shore area. Properties within a mile or two of the water — Marshfield, Plymouth, Cohasset, Scituate — deal with salt air year-round. Salt is hygroscopic, meaning it pulls moisture out of the air and holds it against surfaces, which accelerates rust, breaks down paint film, and promotes mildew. Preparing a house for painting means ensuring it can handle the weather and climate season after season.
- Standard-grade paint gets used on a coastal-exposed home. It may look fine for a season or two, then fail well ahead of schedule.
- Mildew resistance gets overlooked. Coastal humidity means mildew resistance isn’t optional—it’s a baseline requirement.
- Homeowners under-invest in product quality to save upfront cost. Acrylic latex paints like Sherwin-Williams Emerald Exterior or Benjamin Moore Aura Exterior cost more per gallon but are formulated for high-humidity, coastal environments and hold up meaningfully longer.
How to avoid it: Match the product to the exposure. A home two blocks from the water needs a different spec than one ten miles inland, even if the color and finish look identical on the sample chip.

MISTAKE #4: SKIPPING CAULKING BEFORE PAINTING
From November through March, South Shore temperatures cycle repeatedly above and below freezing. Any moisture that works its way into a crack, a failed caulk joint, or a gap in the paint film expands when it freezes—and that cycle, repeated all winter, pushes cracks wider and lifts paint off the substrate.
- Joints and seams get painted over instead of caulked first. Window and door frames, corner boards, and siding gaps are the highest-risk spots.
- Caulking gets treated as cosmetic. It’s moisture management, not a finishing touch — this step alone can add years to the life of a paint job on older Weymouth, Hingham, and Braintree homes.
- Homeowners often paint over old, cracked caulk instead of replacing it. Paint doesn’t restore a failed seal; it just hides it temporarily.
How to avoid it: Caulk every joint, seam, and penetration as a required step before painting, not an optional add-on.
MISTAKE #5: IGNORING UV EXPOSURE WHEN CHOOSING COLOR
South Shore summers bring strong UV exposure, especially on south- and west-facing walls.
- People choose dark, saturated colors for sun-heavy elevations without accounting for fade. Darker colors absorb more UV energy and fade faster than lighter colors in the same exposure.
- Standard pigments are used for bold color choices. High-quality exterior paints with UV-resistant pigments hold their color significantly longer than standard-grade products.
How to avoid it: If you’re committed to a deep or saturated color on a sun-exposed wall, budget for the higher-quality, UV-resistant product — the color choice and the product spec need to be decided together, not separately.
MISTAKE #6: RUSHING RECOAT TIMES OR PAINTING IN THE WRONG CONDITIONS
The recoat time listed on a paint can is a minimum, not a target — and it’s based on ideal conditions that the South Shore doesn’t always deliver.
- The can’s recoat window gets treated as a hard rule. It assumes roughly 70°F and 50% relative humidity. Humidity on the South Shore often runs higher, especially in spring and fall, which slows drying.
- A second coat goes on before the first has fully dried. This traps moisture in the film, leading to poor adhesion, soft spots, and a finish that never fully hardens.
- Painting happens outside the workable temperature/humidity range. Below 50°F or above 85% relative humidity, paint won’t cure properly.
| Condition | Can Label (Ideal) | South Shore Reality |
| Temperature | ~70°F | Often cooler in shoulder seasons |
| Humidity | ~50% RH | Frequently higher, especially near the coast |
| Recoat wait | 4 hours (stated minimum) | Often longer — should be judged on-site, not by the clock |
How to avoid it: Treat recoat time as a floor, not a schedule. Two properly dried coats will always outperform three rushed ones.

MISTAKE #7: DEFERRING MAINTENANCE TOO LONG
Paint is a moisture barrier. When it fails — peeling, cracking, losing adhesion — moisture reaches the wood underneath, and rot follows. Underappreciating this importance is one of several house painting mistakes we see homeowners make.
- Repainting gets pushed past the 7–10 year window that a quality exterior job is built to last, on the assumption that it can wait “one more year.”
- Early warning signs get ignored — hairline cracking, chalking, or dulling color are early indicators, not just cosmetic issues.
- The cost comparison gets missed. Replacing rotted trim, fascia, and siding costs significantly more than repainting on schedule. A professional repaint every 7–10 years is cheaper than the structural repair bill that follows a neglected exterior.
How to avoid it: Budget for repainting as scheduled maintenance, not a discretionary upgrade — and address any rot or damaged wood before paint goes back on, not after. Knowing how to prepare your house for exterior painting means being able to plan and execute that plan effectively.
A NOTE ON OLDER HOMES: LEAD-SAFE PRACTICES
Any home built before 1978 may contain lead-based paint. On the South Shore, where housing stock in Quincy, Milton, Brockton, and surrounding towns includes many pre-1978 structures, this is a practical consideration on a significant share of projects.
Lead paint in good condition and firmly adhered does not pose an immediate health risk—the risk comes from disturbing it through sanding, scraping, or power washing without proper containment. The EPA’s Renovation, Repair, and Painting (RRP) Rule requires certified contractors to use lead-safe work practices on pre-1978 homes: testing or assuming lead presence, containing the work area, using HEPA vacuums for cleanup, and disposing of debris properly.
Homeowners should not sand or scrape painted surfaces on an older home without understanding what they’re dealing with, and should confirm any contractor they hire has EPA RRP certification. South Shore Painting Contractors is fully certified and follows lead-safe protocols on every applicable project.
CHOOSING A COLOR THAT LOOKS POLISHED
Color choice affects curb appeal, perceived value, and how well a home fits its neighborhood and architecture. Homes that read as expensive and well-maintained typically use a limited palette — a body color, a trim color, and an accent door color. Clean whites and off-whites on trim create sharp contrast; body colors in warm gray, greige, navy, sage, and deep charcoal have held strong for years and suit the colonial and Cape-style homes common across the South Shore.
The front door is a high-impact, low-cost decision. A saturated, confident color — deep red, forest green, navy, or matte black — adds character without committing the whole exterior to a bold palette.
South Shore Painting Contractors offers a free color consultation with every estimate, bringing physical fan decks and samples to the property to help homeowners choose a color they’re confident in before paint goes on.
GET THE BEST LOCAL PAINTING SERVICES FOR YOUR HOME
Most paint jobs that fail early don’t fail because of the paint — they fail because of one of the mistakes above. A clean, dry, properly prepared surface, the right sequence, a product matched to the local climate, and work done within the correct temperature and humidity window are what make a paint job last seven to ten years or more. If you are ready to repaint your home and want to avoid some of the common house painting mistakes, give us a call.
South Shore Painting Contractors has worked on homes and commercial properties throughout Quincy, Braintree, Weymouth, Hingham, Scituate, Cohasset, Marshfield, Duxbury, Plymouth, Brockton, Milton, and the surrounding towns for years. If you’re planning an exterior repaint, an interior refresh, a deck restoration, or any painting or carpentry project on the South Shore, contact us for a free estimate and free color consultation.
Let us help ensure your painting project goes smoothly and delivers results you can be proud of for years to come. Contact us today to get started.

FREQUENTLY ASKED QUESTIONS
What is the 80/20 rule in painting?
The 80/20 rule in painting means roughly 80 percent of the visible quality in a finished paint job comes from 20 percent of the actual work—specifically the cutting in, the edge work, and the transitions between surfaces. Rolling a wall or ceiling is the faster, more straightforward part of the job. What separates a professional finish from an amateur one is the precision at every edge: where the ceiling meets the wall, where trim meets siding, where one color stops and another begins. On South Shore homes with detailed trim work, crown molding, and multi-surface exteriors, this edge work requires experience, the right brushes, and patience.
How much should it cost to paint the interior of a 2,000-square-foot house?
Interior painting costs vary based on the number of rooms, ceiling height, surface condition, number of colors, and the level of prep required. For a 2,000-square-foot home on the South Shore of Massachusetts, a professional interior paint job — covering walls, ceilings, and trim in standard rooms — typically ranges from $4,500 to $9,000 or more depending on those variables. Homes with higher ceilings, detailed trim, textured surfaces, or significant prep needs such as patching, skim coating, or priming over stains will fall toward the higher end of that range. South Shore Painting Contractors provides free, detailed estimates with no obligation.
What color makes a house look expensive?
No single color guarantees an expensive look, but certain palettes consistently create a high-end, well-maintained appearance. Homes with a clean, limited color palette — typically a body color, a contrasting trim color, and an accent door color — read as intentional and polished. Warm grays, deep navies, sage greens, and soft whites on the body paired with crisp white or off-white trim tend to photograph well and appeal broadly. Trim color is often more important than body color harp, clean trim gives the home a finished quality, and a bold front door adds character without overwhelming the palette.
What sheen should I use in different rooms of the house?
Sheen should match how a room is used, not just personal preference. Flat or matte finishes hide imperfections well but absorb moisture and stains, making them a poor fit for bathrooms and kitchens. Eggshell or satin finishes offer a good balance of durability and washability for living rooms, bedrooms, and hallways. Semi-gloss or gloss finishes hold up best in high-moisture, high-touch areas — bathrooms, kitchens, trim, and doors — because they resist moisture and clean easily without damaging the finish. Using a flat finish in a bathroom is a common mistake that leads to staining and finish damage that can’t be cleaned off.
Do I really need to wait 4 hours between coats of paint?
Yes — and in some conditions, you may need to wait longer. The recoat time listed on a paint can is a minimum, not a target. It assumes ideal conditions: about 70 degrees Fahrenheit and 50 percent relative humidity. On the South Shore, where humidity can run significantly higher, especially in spring and fall, paint takes longer to dry and cure. Applying a second coat before the first has fully dried traps moisture in the film, which leads to poor adhesion, soft spots, and a finish that never fully hardens. Two properly applied coats with adequate dry time between them will always outperform three rushed coats.