Skip to content
They say don’t judge a book by its cover, but it is very hard not to judge a home by the condition of its exterior paint job. South Shore homes face some challenging conditions when it comes to maintaining an exterior paint job. Salt air, summer humidity, freeze-thaw cycles, algae and mildew growth, and UV exposure can all put stress on siding, trim, and exterior coatings. These conditions can expose weaknesses quickly—but in many cases, premature paint failure begins long before the first coat is applied.
The quality of your paint surface preparation can directly affect how long a paint job lasts. Paint needs a clean, dry, stable surface to bond properly. When surface preparation for painting is rushed or skipped, moisture, loose paint, dirt, mildew, chalky residue, and other contaminants can interfere with adhesion, leading to peeling, blistering, cracking, and early paint failure.
Proper paint preparation steps typically include cleaning the surface, removing loose or failing paint, sanding rough edges, addressing surface issues, allowing the area to dry, and applying the appropriate primer where needed. When these steps are completed correctly, a quality exterior paint job can provide years of protection for a South Shore home. When preparation is rushed, however, even premium paint may fail far sooner than expected.
In this guide, we’ll explain why paint surface preparation matters, how to prepare a painted surface for repainting, and what homeowners should understand before getting a home painted in the South Shore.

WHY SURFACE PREPARATION IS THE FOUNDATION OF EVERY LASTING PAINT JOB
Proper paint surface preparation is not optional—it is one of the most important factors in how well a coating adheres and how long a paint job lasts. Before paint is applied, the surface beneath it must be evaluated, cleaned, stabilized, and prepared to support the new coating.
Professional painters often spend as much—or more—time on surface preparation as they do on applying the finish coats. Even premium paint cannot perform as intended when it is applied over a dirty, damp, unstable, or failing surface.
What Proper Paint Surface Preparation Accomplishes
The right paint preparation steps create a clean, stable foundation for the new coating. Depending on the condition of the surface, proper preparation can:
- Remove dirt, salt residue, mildew, chalk, grease, and other contaminants.
- Eliminate loose, peeling, or failing paint.
- Smooth and feather rough edges between old paint and bare surfaces.
- Address surface issues before they are sealed beneath a new coating.
- Prepare bare or repaired areas for the appropriate primer.
- Reduce the risk of premature peeling, blistering, cracking, and other paint failures.
For South Shore homes, these steps are especially important because coastal moisture, salt air, temperature changes, and biological growth can all affect exterior surfaces over time.
How Paint Bonds to a Surface
Paint can only adhere as well as the surface beneath it allows. For a strong, long-lasting bond, the surface generally needs to be clean, dry, and stable before primer or paint is applied.
Common barriers to proper adhesion include:
- Dirt and dust that prevent direct contact with the substrate.
- Chalky residue left behind by deteriorating paint.
- Salt deposits that can accumulate on coastal properties.
- Mildew and algae that continue affecting the surface beneath a coating.
- Oil or grease that interferes with adhesion.
- Loose or failing paint that cannot support a new coating.
- Excess moisture that can become trapped beneath the paint film.
This is why understanding how to prepare a painted surface for repainting is just as important as choosing the paint itself. A surface may look acceptable from a distance while still having chalking, contamination, moisture, or failing paint that needs to be addressed.
Why South Shore Conditions Make Preparation More Important
South Shore homes are exposed to environmental conditions that can make poor preparation more noticeable—and more damaging—over time. Salt air, moisture, changing temperatures, and biological growth can all affect the condition of siding, trim, and other exterior surfaces.
Before painting, homeowners and contractors may need to address:
- Salt residue that can interfere with paint adhesion.
- Humidity and moisture that prevent surfaces from drying properly.
- Algae and mildew growth, especially on shaded or north-facing areas.
- Freeze-thaw cycles that can worsen cracks and existing paint failure.
- UV exposure that contributes to fading and deterioration on sun-facing surfaces.
- Multiple layers of old paint commonly found on older New England homes.
Addressing these issues during paint surface preparation helps create a more stable foundation for the new coating. It reduces the risk of applying paint over conditions that may cause premature failure.
What Happens When Surface Preparation Is Skipped?
When surface preparation for painting is rushed or skipped, problems can begin soon after the new paint is applied. In many cases, the paint itself is not the primary issue—the problem started with the surface underneath.
Poor preparation can lead to:
- Peeling or flaking paint caused by weak adhesion.
- Blistering or bubbling when moisture becomes trapped beneath the coating.
- Cracking as the paint separates from an unstable surface.
- Chalking or an uneven appearance when new paint is applied over deteriorating coatings.
- Visible ridges and rough areas where failing paint was not properly scraped and feathered.
- Recurring mildew or staining when biological growth was not properly removed.
- Premature paint failure that requires repainting sooner than expected.
These issues can often be avoided by following the appropriate paint preparation steps before applying primer and finish coats.
Why Skipping Preparation Costs More in the Long Run
Skipping preparation may appear to save time at the beginning of a project, but premature paint failure can make the job significantly more expensive over time. A repaint that fails after only a few years may require homeowners to pay for cleaning, preparation, materials, and labor all over again.
Poor paint surface preparation can result in:
- More frequent repainting and maintenance.
- Additional labor to remove multiple layers of failing paint.
- Higher material costs from repeating the project sooner.
- Moisture reaching the wood or other materials beneath the paint.
- Wood rot or deterioration that requires carpentry repairs.
- A larger and more expensive project than would have been necessary with proper preparation.
For homeowners considering having their home painted on the South Shore, preparation should be an important part of evaluating any painting project. South Shore home painting experts should be able to explain the condition of your existing surfaces, identify the preparation work required, and outline the steps needed before the first coat of paint is applied.

THE THREE CORE METHODS OF SURFACE PREPARATION FOR PAINTING
Proper surface preparation for painting typically involves more than one step. Professional painters use different preparation methods depending on the condition of the existing paint, the type of surface, and issues such as dirt, mildew, salt residue, grease, or loose paint.
The three core methods of paint surface preparation are mechanical preparation, chemical preparation, and cleaning. While each serves a different purpose, they often work together to create a clean, stable surface that is ready for primer and paint.
| Preparation Method | What It Involves | When It Is Needed | Why It Matters |
| Mechanical Preparation | Scraping loose or peeling paint, sanding rough areas, feathering paint edges, and scuffing glossy surfaces. Tools may include hand scrapers, wire brushes, sanders, or other appropriate equipment. | When existing paint is peeling, flaking, cracking, uneven, or too glossy for proper adhesion, it is also common on older South Shore homes with multiple layers of aging paint. | Removes unstable material and creates a smoother, more stable surface. Feathering helps prevent visible ridges from showing through the new finish, while sanding can improve adhesion on hard or glossy surfaces. |
| Chemical Preparation | Using appropriate cleaning agents or surface treatments to remove grease, oil, wax, mildew, algae, and other contaminants. Depending on the surface, this may include TSP or TSP substitutes, mildewcide solutions, or other products suited to the material being prepared. | When contamination cannot be adequately removed through scraping or standard washing alone, this is particularly important on surfaces affected by mildew, algae, grease, or other adhesion barriers. | Helps remove contaminants that can prevent primer and paint from bonding properly. The correct product and method should always match the surface being prepared. |
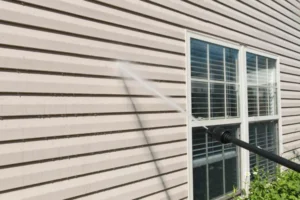
| Cleaning | Washing away dirt, salt residue, chalky paint residue, mildew, and loose material. For exterior surfaces, this may involve power washing or other cleaning methods appropriate for the substrate. | Before most exterior repainting projects, particularly when surfaces have been exposed to weather, coastal salt, biological growth, or general environmental buildup. | Creates a cleaner surface for the remaining paint preparation steps. Pressure and cleaning methods must be matched to the material, since excessive pressure can damage softer surfaces while insufficient cleaning may leave contaminants behind. |
Why These Methods Are Often Used Together
These three methods are not usually separate choices that a painter picks only one of. A typical exterior repainting project may involve cleaning the surface first, mechanically removing loose or failing paint, treating specific problem areas, sanding and feathering edges, and then applying the appropriate primer.
Understanding how to prepare a painted surface for repainting means recognizing that every home and surface may require a slightly different process. Older wood siding, previously painted trim, masonry, and surfaces exposed to South Shore salt air and moisture may all need different combinations of preparation methods.
For homeowners, the important question is not simply whether the surface will be painted, but what needs to happen before the first coat goes on. A thorough evaluation and the right preparation process help ensure the new coating has a clean, stable surface to bond to and can deliver the long-term protection homeowners expect.
THE ROLE OF PRIMING IN SURFACE PREPARATION
Priming is an essential part of paint surface preparation because it helps create a stable bond between the prepared substrate and the finish coat. The right primer depends on the surface being painted and its condition. Bare wood, for example, needs a primer that seals exposed fibers and helps prevent issues such as tannin bleed-through, while previously painted surfaces in good condition may only require light sanding, cleaning, or a bonding primer.
Masonry, stucco, and concrete may require primers formulated to work with their specific surface properties. On South Shore homes with exposed or scraped wood, selecting the right primer is especially important because moisture, salt air, and seasonal temperature changes can place additional stress on the coating system.
The extent of priming also depends on how much of the existing paint has failed. Spot priming may be appropriate when only small areas of bare or scraped material are exposed. At the same time, a full prime coat may be necessary when paint failure is widespread, or the existing surface is heavily chalked or unstable.
Applying finish paint directly over a poorly prepared or deteriorating surface can compromise adhesion and shorten the life of the new coating. As part of proper surface preparation for painting, the primer and priming method should be matched to the substrate, the condition of the existing finish, and the level of preparation the surface requires.

THE RETURN ON INVESTMENT OF PROFESSIONAL SURFACE PREPARATION AND PAINTING
Proper paint surface preparation is more than simply power washing a home and scraping away visible peeling paint. Before a new coating is applied, the existing surface needs to be evaluated to determine the cause of the paint failure and the required preparation steps. Moisture problems, chalking, mildew, salt residue, failing paint layers, damaged wood, and poor adhesion can sometimes look similar from the ground, but they may require very different solutions.
Experienced South Shore home painting experts can evaluate the surface condition and determine the appropriate preparation before painting begins. Professional preparation may involve:
- Identifying loose, unstable, or failing paint that needs to be removed.
- Checking for moisture damage or other underlying issues before repainting.
- Determining whether surfaces need washing, sanding, scraping, repairs, or additional treatment.
- Matching cleaning methods and pressure levels to the material being prepared.
- Identifying areas that require spot priming or a more extensive primer application.
- Selecting preparation methods appropriate for wood, masonry, trim, and previously painted surfaces.
- Recognizing when damaged materials need repair before a new coating is applied.
The Wrong Preparation Can Create a Bigger Problem
One of the biggest risks of rushed or inexperienced surface preparation for painting is that the new paint may temporarily improve the home’s appearance without addressing the underlying problem. Peeling paint can be scraped and repainted, for example, but if moisture intrusion, unstable coatings, mildew, or deteriorating wood caused the failure, the same problem may return.
Professional preparation helps homeowners avoid:
- Painting over loose or unstable existing coatings.
- Trapping moisture beneath the new paint film.
- Using excessive pressure that can damage wood or other exterior materials.
- Applying the wrong primer or coating system for the surface.
- Missing areas of rot or deterioration that should be repaired first.
- Repainting prematurely without addressing the underlying cause of paint failure.
- Paying to repeat the project sooner because the preparation process was incomplete.
For homeowners considering having their home painted on the South Shore, the preparation process should be just as important as the paint color or finish. A professional painting contractor should be able to explain what is causing the existing paint to fail, which paint preparation steps your home needs, and how those steps will help the new coating last.
If your South Shore home or commercial property has peeling, blistering, cracking, chalking, or other signs of paint failure, now is the time to act. The first step is determining what is happening beneath the existing coating. Local home painting services can provide a professional assessment of the surface and recommend the preparation that is needed to help protect your South Shore home.
Our team brings hands-on knowledge of South Shore surfaces, coastal conditions, and older New England homes that require careful, experienced preparation. We are licensed, insured, and trained in lead-safe practices. Contact us today to schedule your free estimate, request a color consultation, and view our local project gallery to see the quality of work we deliver right here on the South Shore.

FREQUENTLY ASKED QUESTIONS
What are the three main methods of surface preparation for painting?
The three main methods of surface preparation for painting are mechanical preparation, chemical preparation, and cleaning. These methods may include scraping failing paint, sanding rough areas, removing contaminants, and washing exterior surfaces to create a clean, stable foundation for primer and paint.
Can you use mineral spirits to prep a surface for paint?
Mineral spirits can help remove grease, oil, or wax from certain metal and previously painted surfaces before priming. They are not a general-purpose cleaner for wood or masonry and should fully evaporate before painting. Always match cleaning products to the surface and coating system.
What should you use to prep a painted surface for repainting?
To prepare a painted surface for repainting, clean away dirt, mildew, salt, and chalky residue, then remove loose or failing paint. Sand and feather rough edges, allow the surface to dry, and apply the appropriate primer to exposed or problem areas.
How long does a properly prepared exterior paint job last on a South Shore home?
A properly prepared exterior paint job may last many years, depending on the surface, paint system, weather exposure, and ongoing maintenance. South Shore homes exposed to salt air and moisture may require more frequent inspections and maintenance than less exposed properties.
Why does paint peel on older New England homes, and how does surface preparation help?
Paint often peels when older coatings lose adhesion or moisture gets beneath the paint film. Multiple paint layers, salt, humidity, mildew, and freeze-thaw cycles can contribute. Proper paint surface preparation removes unstable material and creates a cleaner, more stable surface for repainting.
Do you need to remove all old paint before repainting?
No. Old paint does not always need to be completely removed if the existing coating is clean, dry, sound, and firmly adhered. Loose, peeling, cracked, or otherwise failing paint should be removed before repainting to prevent the new coating from failing with it.
Do you need to power wash before painting a house?
Power washing can be an important step in paint preparation because it removes dirt, mildew, salt residue, chalk, and loose material. However, pressure must be appropriate for the surface. Excessive pressure can damage wood, siding, masonry, or other exterior materials.
Should you sand before repainting?
Sanding is often necessary when removing failing paint, smoothing rough surfaces, feathering scraped edges, or improving adhesion on glossy finishes. Not every surface requires the same amount of sanding, so the preparation method should be based on the material and condition.
Can you paint over peeling or chalky paint?
Painting directly over peeling or heavily chalked paint can lead to poor adhesion and premature failure. Loose material should be removed, affected areas properly cleaned and prepared, and the appropriate primer applied when needed before new finish coats are added.
When should you hire a professional for surface preparation and painting?
Professional help is especially valuable when paint failure is widespread, surfaces show moisture damage, multiple layers of old paint are present, or you are unsure why the existing coating failed. South Shore home painting experts can evaluate the surface and recommend appropriate preparation steps.