Skip to content
When it comes to maintaining your home’s beauty and protection, few projects make as significant an impact as exterior painting. A fresh coat of paint doesn’t just boost curb appeal, it also shields your home from harsh weather, UV rays, and moisture. But before you grab a brush or call the pros, it’s worth understanding the process in detail.
In this guide, you’ll learn exterior house painting how-to, from start to finish, covering everything from preparation to final touches, plus expert insights on when to hire professional exterior house painters in the South Shore. Let’s dive into this exterior house painting how to now!
Exterior House Painting How To – a Step by Step Guide
A successful paint job starts with proper preparation. Whether you plan to do it yourself or hire a house painter South Shore homeowners trust, the following steps will help ensure professional quality results that last for years.

Step 1 – Inspect and Prepare the Surface
Before anything else, scrutinize your home’s exterior. Look for peeling paint, cracks, mildew, or water damage especially around trim, windows, and siding. Addressing these problems early prevents future deterioration and ensures paint adheres properly.
Clean, Sand, and Prime
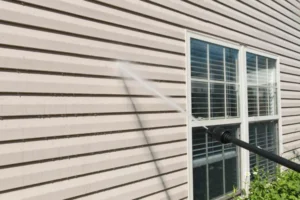
Clean the entire surface using a power washer or mild detergent and water. This removes dirt, mildew, and loose paint. After cleaning, scrape off any flaking areas and sand rough spots to create an even surface.
Once the surface is smooth, apply a quality primer. Primer seals porous materials, improves adhesion, and creates a consistent base for your new paint color. If you’re unsure which primer to choose, consult local painting contractors in South Shore for recommendations suited to your home’s materials and climate.
Step 2 – Repair Damage Areas
Surface repair is one of the most important parts of any exterior house painting how to guide. Pay attention to details like cracks, gaps, or rotted trim these imperfections can ruin the final result if left untreated.
Caulking and Wood Repair
Use caulk to seal gaps around windows, doors, and joints to keep moisture out. Replace any damaged or rotted wood to ensure your new paint bonds to a stable surface. Repairing trim and siding not only improves appearance but also extends the lifespan of your paint job.
Step 3 – Choose the Right Paint & Tools
Another crucial step in an exterior house painting job is choosing the right materials. Not all paints or tools are created equal, and the right selection can mean the difference between a finish that lasts ten years and one that peels within two.
Best Paints for Exterior House Painting
For most homes, high-quality acrylic latex paint is the top choice. It resists fading, mold, and cracking perfect for the variable New England weather. Look for paint with built in UV protection and mildew resistance to keep your exterior looking fresh.
Must-Have Tools
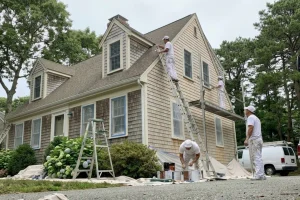
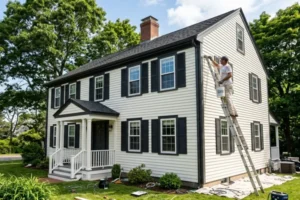
Equip yourself with sturdy ladders, durable brushes, rollers, and possibly a sprayer for even coverage on large surfaces. Don’t forget safety gear like gloves, goggles, and non slip footwear. Professionals use specialized equipment for precision and efficiency, which is another reason many homeowners choose to hire painting contractors in South Shore instead of going fully DIY.
Step 4 – Apply Paint Like a Pro
Now comes the most rewarding part applying the paint. This step determines how your final finish looks and how long it lasts.
Techniques for Even Coverage
Apply thin, even coats instead of one thick layer. Use long, consistent brush strokes and maintain a “wet edge” to avoid lap marks. Allow each coat to dry completely before applying the next.
If you’re painting a large home or working with intricate details, exterior house painters often use airless sprayers to achieve smooth, uniform finishes more quickly.
Work from Top to Bottom
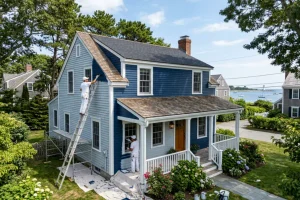
Start with the eaves and soffits, then move down to siding, doors, and trim. Working from top to bottom prevents drips from ruining freshly painted areas below.
Ideal Weather Conditions for Painting
When planning your project, pay close attention to the weather conditions. Ideal temperatures range from 50 °F to 85 °F, with low humidity levels to guarantee proper drying. Avoid painting in direct sunlight or during rain, as these factors can affect the final finish and your cleanup process.
Step 5 – Finishing Touches & Clean Up
The final step in your exterior house painting how to process is ensuring a clean, polished result. After the paint has dried, remove all painter’s tape and coverings. Check your work under natural light to catch any missed spots.
Final Inspection and Touch-Ups
Inspect the entire exterior for uneven areas, drips, or streaks. Pay special attention to corners and edges. Ensure all surfaces are free from drips or uneven textures, as these details greatly influence your home’s overall appearance. Touch up with a small brush for precision, feathering edges to blend seamlessly.
Clean and Protect
Clean brushes, rollers, and equipment immediately to prolong their lifespan. Dispose of leftover paint properly or store sealed cans for future touch ups. Finally, remove protective coverings from windows and landscaping to reveal your beautifully refreshed home.
DIY vs. Hiring Professional Exterior House Painters
Many homeowners start their project with enthusiasm, but quickly discover that exterior house painting how to involves more than just brushing on color. Here’s what to consider before deciding between DIY and hiring experts:
The DIY Route
Painting your home yourself can save money upfront and give you a sense of accomplishment. However, it’s time consuming and physically demanding. Without proper tools, ladders, or safety equipment, it can also pose risks especially for multi story homes.
When to Call a Professional Painting Contractor in South Shore
Hiring local house painters offers significant advantages that make deciphering the exterior house painting how to easier. They include:
- Safety: Professionals are trained and equipped for heights and complex surfaces.
- Efficiency: Crews complete jobs faster with advanced tools and methods.
- Durability: Pros use premium materials and proven techniques for longer lasting finishes.
- Peace of Mind: Licensed and insured painting contractors South Shore handle every step from prep to cleanup so you can relax knowing your home is in expert hands.
While DIY projects can be satisfying, the superior quality and long term value delivered by professional painters often make them well worth the investment.
Also, if you notice widespread damage or wood rot, it’s best to call experienced exterior house painters or carpenters. Professional teams can handle repairs efficiently and ensure every inch of your exterior is paint ready before work begins.
Why Choose South Shore Painting Contractors?
When it comes to exterior house painting in the South Shore, South Shore Painting Contractors stands out for its commitment to excellence, craftsmanship, and customer satisfaction.

Our experienced team uses top grade materials, thorough prep techniques, and precise application methods tailored to New England’s weather conditions. As trusted painting contractors in South Shore that homeowners rely on, we ensure your property not only looks incredible but also stays protected for years.
What Sets Us Apart
- Skilled, licensed, and insured painters with years of experience.
- Premium, weather resistant paints and coatings.
- Transparent communication and detailed project timelines.
- Clean, respectful work practices from start to finish.
We treat every home as if it were our own because your satisfaction is our highest priority.
Final Thoughts on Exterior House Painting
A successful exterior paint job takes more than color it requires planning, patience, and attention to detail. By following this exterior house painting how to guide, you’ll understand what it takes to create a long lasting, beautiful finish that enhances your home’s curb appeal and value.
But if you’d rather skip the hassle and guarantee flawless results, trust the professionals who do it every day.
Ready to transform your home with a fresh coat of paint? Contact South Shore Painting, your trusted painting contractors in the South Shore, for a free estimate today. With this exterior house painting how to guide in hand, you are off to a great start. Let our expert exterior house painters bring out the best in your home!
Frequently Asked Questions
1. How do I choose the right color for my house exterior?
Start by considering your home’s style, roof color, and surroundings. Neutral shades often enhance resale value, while bold accents can highlight architectural details. Always test paint samples on sunny and shaded areas to see how light changes the color throughout the day before committing.
2. What’s the best season for exterior painting?
Late spring through early fall is ideal. During these months, temperatures and humidity are moderate, allowing paint to dry and cure properly. Avoid extreme heat, cold, or rainy conditions to prevent bubbling or peeling.
3. How long should an exterior paint job last?
A quality exterior paint job typically lasts 7–10 years, depending on your local climate, paint type, and prep work. Homes near the coast may need repainting sooner due to salt and moisture exposure. Regular cleaning and quick touch ups can help extend the lifespan.
4. Is it okay to paint in humid or damp conditions?
It’s best to avoid it when possible. High humidity slows drying and can trap moisture beneath the surface, leading to blistering or uneven finishes. If humidity is unavoidable, use a paint designed for moisture resistance and paint during the driest part of the day.
5. Do I need to prime before painting?
Yes, in most cases. Primer helps new paint adhere better, especially on bare wood, repaired areas, or over darker colors. It also creates a smoother, longer lasting finish. Skipping primer may lead to premature peeling or uneven coverage.
6. What should I do if it rains right after painting?
If rain hits before the paint has cured, gently blot or dry the area once conditions improve. Afterward, check for streaks or water spots and touch up if needed. To prevent this, always check the forecast and allow at least 24 hours of dry weather after painting.