Steps For Painting the Exterior Of a House
Every home requires painting the exterior at some point. Typically, with today’s technology, research, and development, most exterior paints hold up even through extreme conditions for 15+ years. But this is only true if proper steps are taken. South Shore Painting Contractors know these steps inside and out but if you are looking to do it yourself you may want to reconsider. Look at the process below and consult a reputable house painter before embarking on this monumental project.
Power wash
If pressure washing is not done, any new paint will trap dirt and grime underneath, risking the paint’s life and duration. Pressure cleaning gives the painter a clean area to work with. A high-powered pressure washer is needed, and they can be difficult to manage.
Related Post: Why Is It Important To Pressure Wash Your Home Before Painting?
Repairing
Repairing and/or replacing rotten or peeling shingles and trim is essential to the exterior paint for proper adhesion. It is proven that paint will not grab, hold, or adhere to any surface that is deteriorated or not prepped correctly. Inspect every part of the outer surface, making sure it is solid, without any wood rot present. Often tapping on the wood can determine if it is sound.
Scraping loose paint
After the siding and trim have entirely dried out, scraping any loose paint or wood is required and must be removed. The high-pressure power washing will remove paint that is currently flaking but will not get the majority. After surfaces have dried out, again, a hand scraper must be used to check problem areas of the exterior siding and trim.
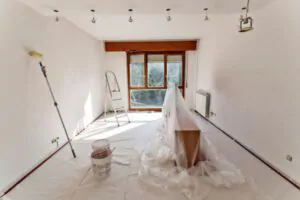
Caulking open joints – Filling In thickness differences
Areas that have been spot-prepped must be evened out and scraped away. You can use a spackle or other fillers to create a finished look. Sanding the site after it has dried, leaving a perfectly smooth surface to paint later is essential.
Sanding and Priming
Now that the areas are prepped, it is time to sand to a smooth finish. Spot prime any bare wood and areas that have been stripped. Rarely do we see vinyl exteriors needing priming, as it rarely cracks, peels, and flakes off. The trim paint is the first area to wear in most homes, given that primers were seldom used in older homes. Bare wood is where primers are essential to spot prime, usually brushed on by hand.
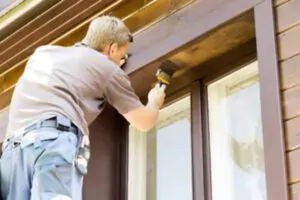
Masking and Taping
Now that power-washing, cleaning, scraping, caulking, and priming are completed, it is time to mask all areas around where to paint. Once up on the ladder, it is difficult to avoid the areas that are outside the chosen paint area. These areas include covering glass, doorways, concrete, brick, and railings.
Choosing Color scheme
If you are considering different colors, it is a great idea to put a large swath of paint on the home’s front and back. When looking at a color on paper, often it changes when outdoors, in the sunlight, at a distance, etc. Once you order the paint, the amount and color choice in now permanent. Two coats are usually required therefore it can get costly.
Other things to consider
1. Use a brush on your trim, windows, doors, etc. to remove any residue
2. Use a roller for painting gutters, flashing, and handrails
3. Seasons – what season is best to paint your house

Hopefully, this is a general outline that roughly describes the painting of the exterior of a house. If you now feel that it is too extensive a project, reach out to a professional on the South Shore who has experience and can resolve unforeseen problems along the way.